How to create a newsletter in under 10 minutes
Table of Contents Jump to:
Jump to:
Table of contents
TL;DR: Got 10 minutes? We’ll show you how to create a stunning, high-converting email newsletter in less time than it takes to brew a cup of coffee or tea.
Are you new to email marketing or Flodesk and curious about how to create high-converting, beautifully designed emails for your small business in half the time? We’re here to help.
Learn how to brand, design and test your email in under 10 minutes, so it’s picture-perfect when you send it to your subscribers. We’ll cover everything from design to copy to your subject lines.
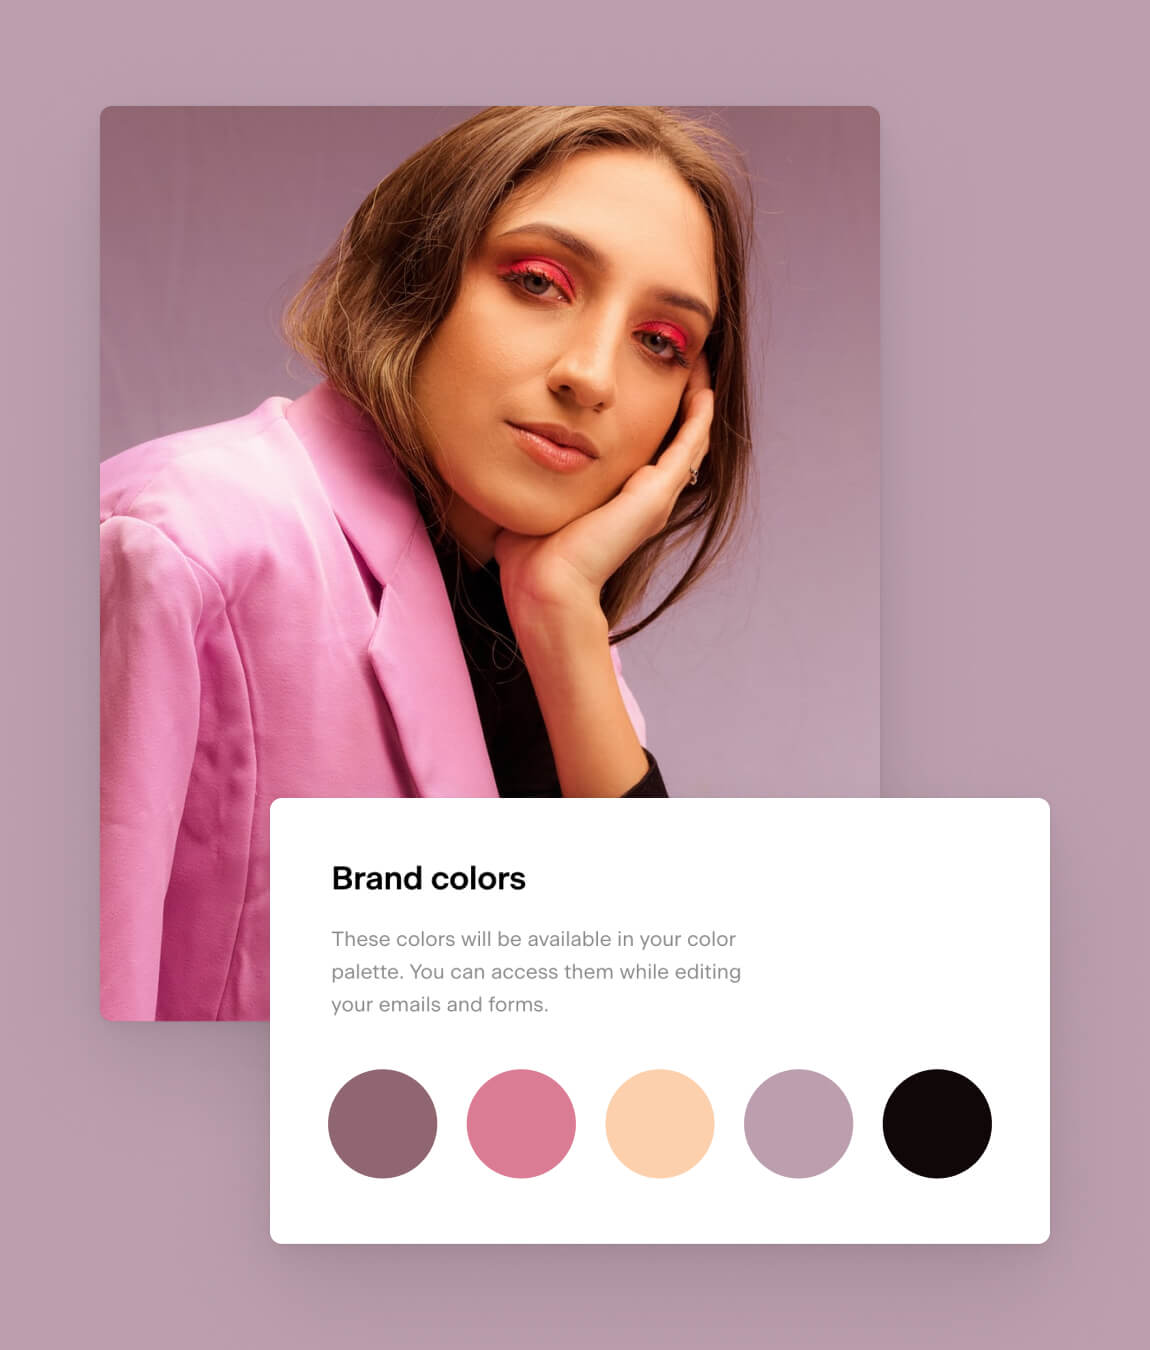
- Add your logo, brand colors and social media links to your account
- Pick an email template you love
- Brand your email using your company colors and logo
- Add compelling copy that draws your readers in
- Create catchy but clear copy for your CTA
- Switch between views to see how your email looks on desktop and mobile
- Create an open-worthy subject line with preview text
- Send yourself a test email to see what it looks like in action
Every small business (SMB) is different. Some use email newsletters to build brand awareness, while more established SMBs use newsletters to consistently engage with their subscribers and drive sales. But there are so many other reasons to start using or optimizing your newsletter. Forbes highlights a few:
- Brand awareness. Give subscribers a better idea of who you are and what you offer.
- Relationship building. Sending newsletters consistently—weekly, monthly or even quarterly—can build stronger relationships with your subscribers.
- Drive action (and sales). Whether you want your subscribers to register for your webinar or purchase your coaching services, newsletters are the perfect way to highlight your value and share compelling information and images that inspire action.
- We’d also add: Announcements. Let your subscribers know about product launches, upcoming events or giveaways.
No matter the goal of your newsletter, we’ll help you create one that your subscribers can’t wait to open every time it hits their inbox.
When you think of McDonald’s or Coca-Cola, does a particular image come to mind? Big brands spend thousands of dollars designing their logos and developing brand guidelines that make them instantly recognizable.
While a logo is only one part of your branding, it’s the most visible part. You might already be using your logo on your website, your social media accounts or even the content you create. Why not add it to your newsletters too?
If your email marketing platform has a branding page, save your logo and brand colors there so you can easily access them for every email you send. Consistency is key!
If you want to give your subscribers a behind-the-scenes view of your business, share content from your social channels or just connect with them out of the inbox, you can connect your social media accounts to your newsletters too. With Flodesk, you can choose from 14 social media accounts and connect them all or none at all—it’s up to you.
What I do: I connect my highest-converting social media channels (LinkedIn and Instagram), use my logo as the header of every email and use brand colors throughout my newsletters.

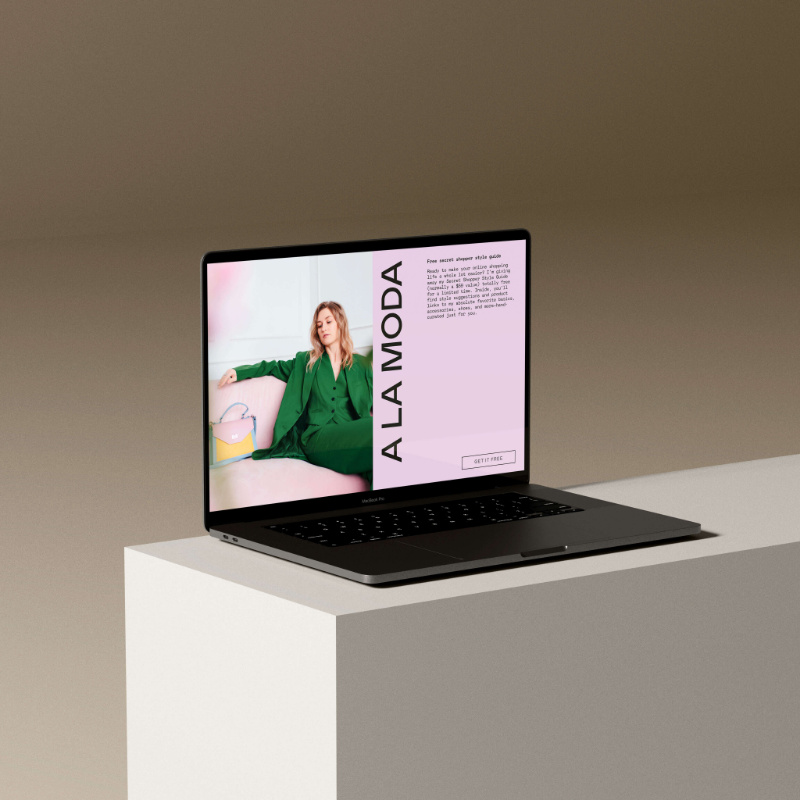
Step 2: Find an email template you love
Are you announcing a semi-annual sale that you want to be the sole focus of your email? Or are you announcing a rebrand? Finding the right template can make all the difference in how you convey your message. Here are some templates we love for different communications:
- Promote a sale: Use an announcement template with large headlines and a featured image to make your sale stand out.
- Share new content: Choose a roundup template that features a few images with action items that link to different pieces of content.
- Introduce yourself: Use a plain text template to bring the focus to your story and give subscribers a more personal feel.
Pro tip: Add an Instagram block to any template to invite already engaged subscribers to connect with you on social media too.
Before you start scanning templates, choose the goal of your newsletter and find one that matches the goal you set. Don’t worry, you’ve come to the right place. We’re known for our show-stopping templates.
What I do: I use my newsletter to engage with subscribers about new blogs, so I like to keep my templates consistent. I use a welcome email template that lets me share photos and tell my story and a more structured template that combines an image with text, which is the perfect way to share my blog.
Step 3: Customize the template using your logo and brand colors
Now that you’ve got your logo and brand colors saved in your account, you can easily apply them to your email template. Remember, using your logo and brand colors helps your subscribers quickly identify you in and out of the inbox.
In Flodesk, all our templates have a logo block built in, so your logo will show up automatically. But you can get creative with where you want your logo to show up and how you apply brand colors. We’re all for beautiful designs, but make sure your emails are still readable. There are a few brands who do this well, including:
- Apple
- Crate & Barrel
- Starbucks
What I do: I keep my logo at the top of my newsletter. I use my brand colors as the background for most blocks, using a high-contrast text color to ensure it’s readable but still the aesthetic I’m going for.
Step 4: Write email copy that converts subscribers into customers
What works for one business might not work for your business. Trial and error and knowing your audience can help you write compelling copy they want to read, but there are also some tried and true tactics for writing better email copy.
Hubspot, the authority on all things inbound marketing, sales and customer service, has a few tips:
- Align your subject line to your email copy. If your subject line promises an exciting announcement, the body copy should deliver on that.
- Be relevant. Are your subscribers looking for educational content, but you’re only sending them sales emails? Your subscribers opted-in to your email with an expectation of specific content and it’s your responsibility to meet that expectation.
- Make it personal. [First name] merge tags are great. Relevant content is even better. Addressing your subscribers in a conversational tone is one of the best ways to personalize your email. Write in second person (you, your, yours) to keep the focus on your subscribers, not you.
- Keep it concise. As a writer, I am constantly fighting the urge to tell my entire story in an email. But when you overload your emails with too many words, your subscribers can’t skim through everything to decide if they want to take action (like clicking your CTA).
- Be action-oriented. You’ve probably set a goal for your newsletter, whether it’s boosting sales or getting them to visit your blog. To achieve that goal, use a compelling CTA. Resist the urge to be witty or overly creative and instead, make your CTA copy clear, concise and actionable. I use, “Read more” for mine to drive traffic to my blog.
What I do: I’m a writer by trade, so I know my stuff from years of experience and learning. I keep my copy short and deliver on what I promised to my subscribers when they opted in.
Step 5: Add a CTA to drive your subscribers to take action
Taking action can look different for everyone. For me, it’s visiting my blog. For you, it could be downloading a digital guide, signing up for your course, using a discount code to purchase your handmade jewelry or anything in between.
Regardless of your goal, a CTA can help you achieve it. A button that your subscribers click on is a common CTA, but you can use links too (like in your email sign-off [LINK TO EMAIL SIGN-OFF BLOG]). Just make sure your CTA is clear and concise. Use simple action verbs that inspire your subscribers to click on the link or button. Here are a few CTAs we love:
- Read more
- Get started
- Download
- Sign up
What I do: I keep it simple. “Read more” directs them to my blog, making it very clear that they can access the full post there.
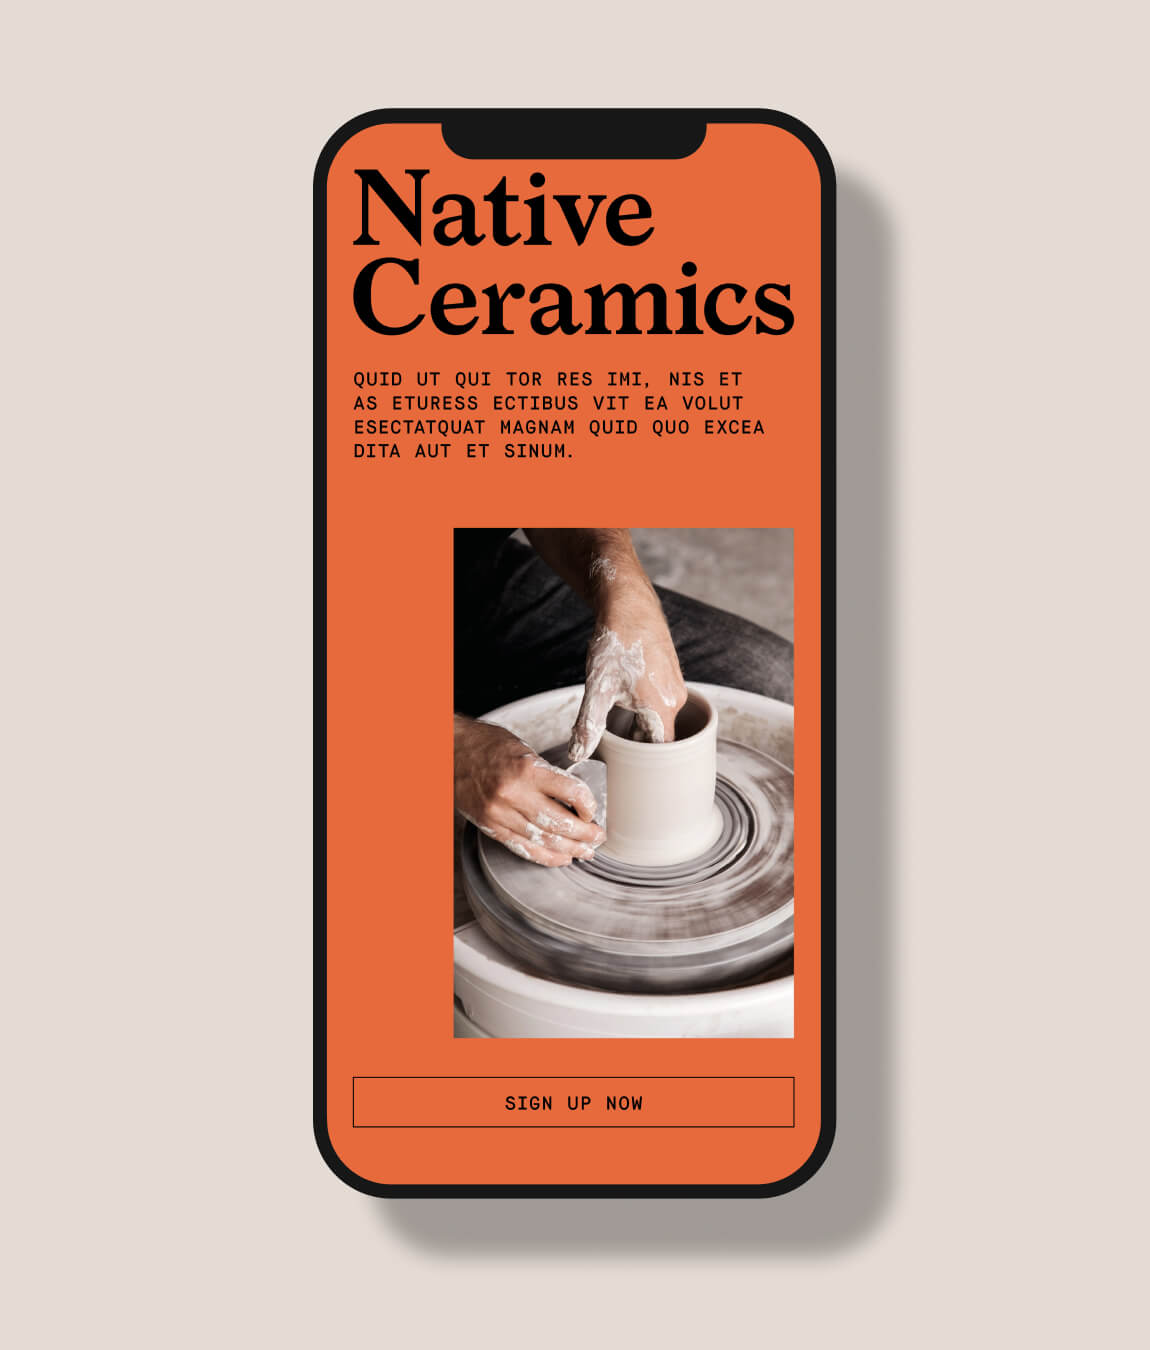
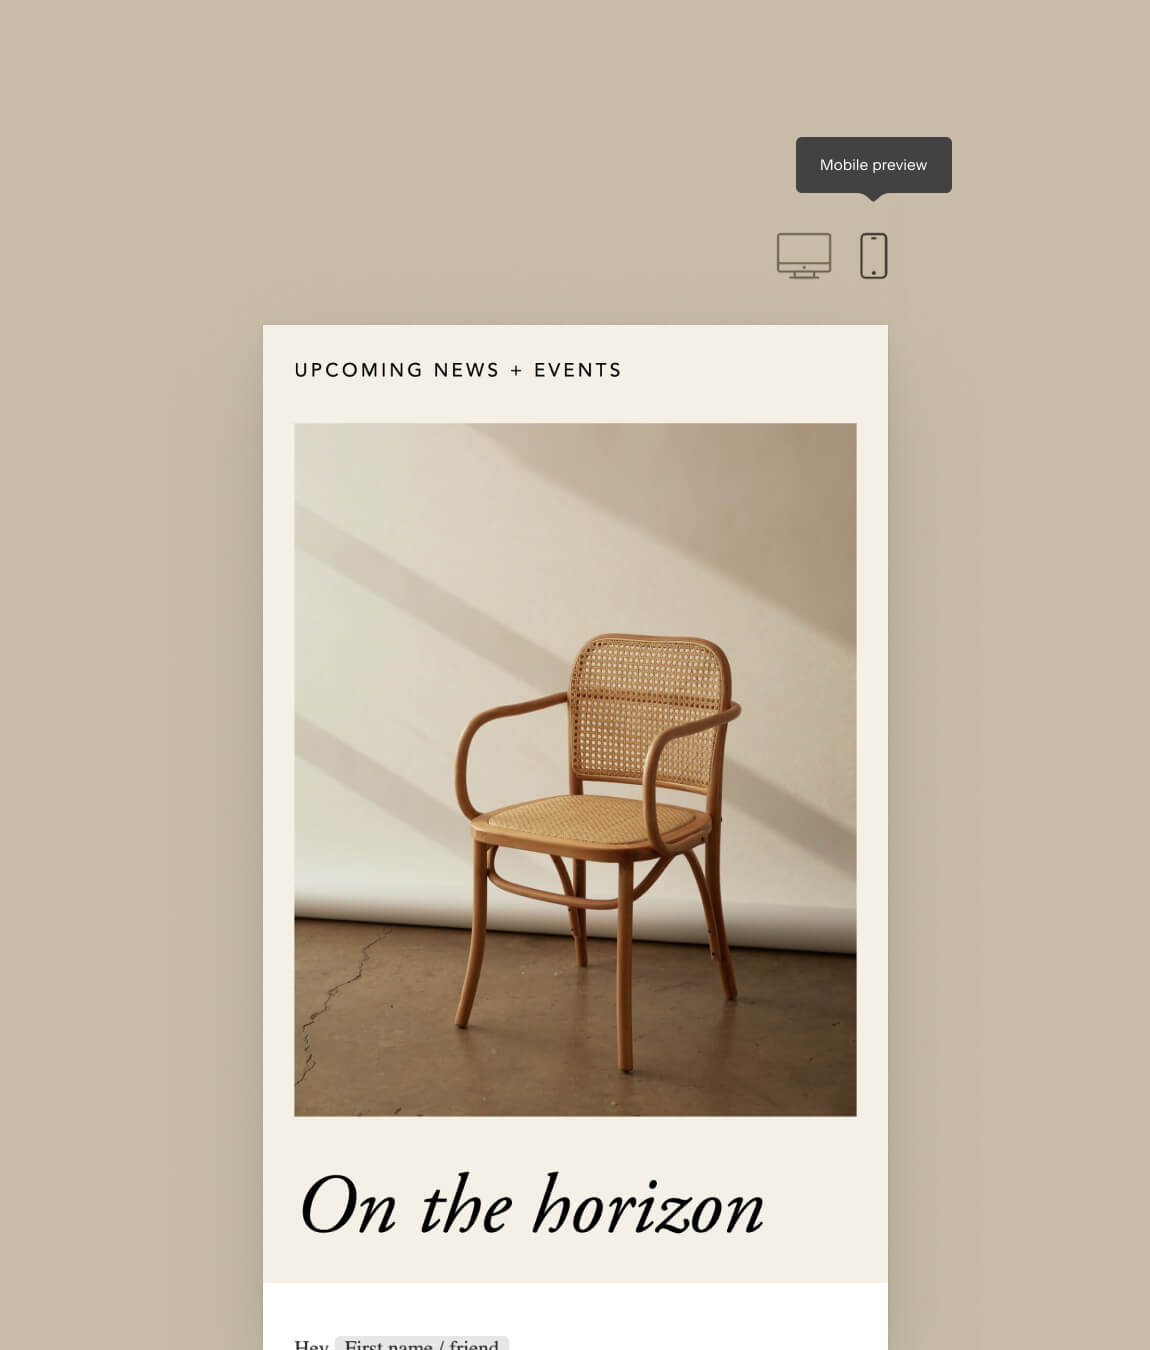
Step 6: Preview your email on desktop and mobile
Did you know that over 40% of email views come from mobile devices? Give subscribers who view your newsletter on their phones a great experience. We’ve got a few tips to help you design a mobile-friendly email, but you can also preview your email on mobile before ever sending it.
Make sure your design looks good on mobile
Once you’ve designed your newsletter, you can switch views between desktop and mobile to make sure everything looks how it’s supposed to. In Flodesk, this is in the top-right corner of your screen.
We optimize our templates to be mobile-friendly, so your emails should look on any device. But just to make sure, we always suggest looking at it in the mobile preview.
Step 7: Create an irresistible subject line and preview text
It’s one thing to make it to your subscribers’ inboxes, but it’s quite another to get them to open your email. They can’t see all the good stuff in your email when it just sits in their inbox, but you can motivate them to open it and explore your content by creating a compelling subject line.
Entice subscribers with your subject line
The subject line should preview what’s in the email, but not give too much away. Remember, you want to keep it short and sweet, and above all else, clear. Would you open an email if you couldn’t understand what the subject line was trying to convey? Me neither!
Yay or nay to emojis?
There’s a neverending debate about using emojis in subject lines, but if you choose to use them, make sure they’re relevant. Using a dog emoji in a subject line about a conference you’re speaking at doesn’t make sense, but using a heart emoji with a subject line about how much you love a sale does.
Look at these subject lines that got me to open the email (and actually read it):
- Less content, more results
- Transform generational wealth (2 ways)
- Launching tomorrow: New swim!
- Should you write copy for free? 📺
View some of our favorite tips and then play around and see what works for you.
Give subscribers a preview of what’s inside
Preview text, the often overlooked line of copy following your subject line, gives you more space to tell subscribers what to expect in your email. Maybe your subject line shares an exciting new course you’ve launched and the preview text uses a few words to describe that course.
How much preview text your subscribers see depends on if they view it on mobile or desktop and who their email provider is, so it’s best to keep it short.
What I do: I keep my subject line and preview text pretty straightforward but still true to my quirky side.
My welcome email subject line: You’re part of the fam! Welcome to Snack-Sized Syntax
My welcome email preview text: You’ll get fresh content, delivered monthly, from yours truly.
Step 8: Send yourself a test email
You would be amazed how many times I don’t recognize a typo or change my mind about a layout after sending myself a test email.
Everything looks great in the email builder, but then I send myself a test email and start seeing what I want to change. This is why I always send myself a test email before sending an email to my subscribers. In Flodesk, you simply follow the steps after you write your subject line and preview text to send a test email.
I typically send one to myself and a family member. And because I know that my subscribers view my emails on their phones, I check the email on both my desktop and my phone. You can do the same by sending test emails to anyone you like. Here’s who we suggest:
- The grammar nerd: Your friend who can spot a grammar mistake or typo a mile away.
- The mirror friend: A partner or sibling who knows you well enough to know whether your email is true to you/your brand or if you’re being inauthentic.
- The tester: A family member who won’t mind testing the links in your email.
Ready, set, send
In less than 10 minutes, you’ve created a beautiful newsletter your subscribers will love. All that’s left to do is hit “Send.” Or, if you want to add your email newsletters to a workflow, you can do that, too. We can’t wait to see what you’ll design next!

Related Articles